05. Separating Point Clouds
Header Text
Separating Point Clouds
In the previous exercise, you got inliers which are indices for the fitted plane. Now you will be using these inliers to create the plane point cloud and obstacle point cloud.
ND313 C1 L2 A08 Separating Point Clouds Pt 1 [LB]
Instructions
You can separate point clouds by calling the
SeparateClouds
function from
processPointCloud
. You can use this function inside
SegmentPlane
with the calculated inliers and input cloud.
Inside the
SeparateClouds
function stub, create two new point cloud pointers, one for obstacles (non-plane points), and one for road (plane points). The inliers can be added to the plane cloud by looping over the inlier indices and pushing the corresponding inlier point into the plane cloud’s point vector.
To generate the obstacle cloud, one way to use PCL to do this is to use an
extract
object, which subtracts the plane cloud from the input cloud. Now you can return the
std::pair
with the newly created obstacle and plane clouds:
std::pair<typename pcl::PointCloud<PointT>::Ptr, typename pcl::PointCloud<PointT>::Ptr> segResult(obstCloud,planeCloud);
The pcl segmentation
tutorial
shows how to use an
extract
object in lines 67-70.
Back in environment.cpp you can then call pointProcessor function on the input cloud and render the two segmented point clouds in different colors.
std::pair<pcl::PointCloud<pcl::PointXYZ>::Ptr, pcl::PointCloud<pcl::PointXYZ>::Ptr> segmentCloud = pointProcessor->SegmentPlane(inputCloud, 100, 0.2);
renderPointCloud(viewer,segmentCloud.first,"obstCloud",Color(1,0,0));
renderPointCloud(viewer,segmentCloud.second,"planeCloud",Color(0,1,0));
Notes
The above example is using 100 iterations, and a distance tolerance of 0.2 meters. You are highly encouraged to play around and experiment with these values! This point cloud is very simple and 100 iterations are way more than needed. You can also monitor how changing the iterations affects the time it takes for the segmentation function to process using the functions predefined timer log.
Before rendering the two clouds you will want to remember to turn off rendering from the input cloud done in the previous lesson, otherwise the clouds will all overlap, and it will be hard to distinguish the segmented ones. The renderPointCloud function includes color options (Red,Green,Blue). By default the cloud is white if no color is specified. Here the obstacle cloud as is rendered as red, and the plane cloud as green.
Segment Simulation PCD
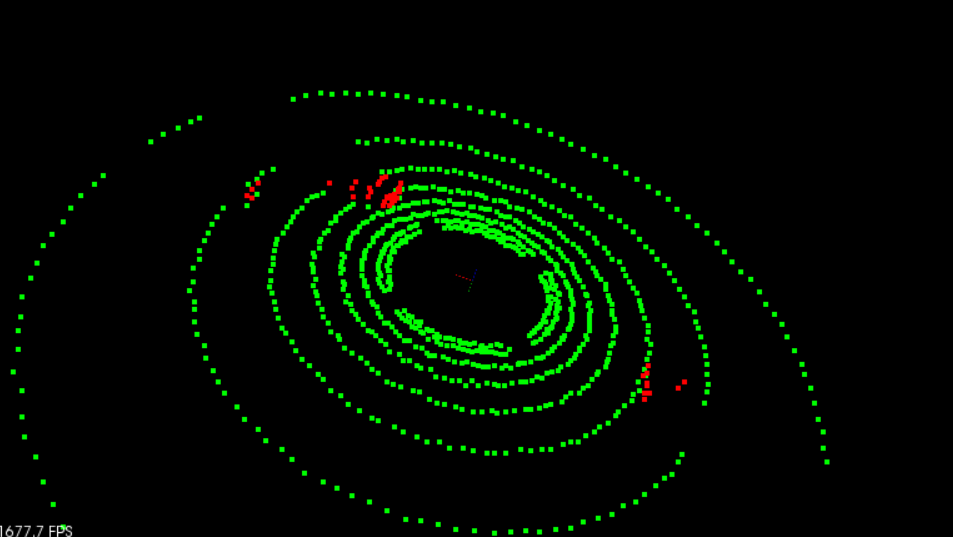
Segment and separating point clouds: road points in green, and other obstacle points in red
Separate Point Clouds
Workspace
This section contains either a workspace (it can be a Jupyter Notebook workspace or an online code editor work space, etc.) and it cannot be automatically downloaded to be generated here. Please access the classroom with your account and manually download the workspace to your local machine. Note that for some courses, Udacity upload the workspace files onto https://github.com/udacity , so you may be able to download them there.
Workspace Information:
- Default file path:
- Workspace type: react
- Opened files (when workspace is loaded): n/a
Solution
Solution
ND313 C1 L2 A10 Separating Point Clouds Solution